For any true Marvel fan, the meticulously crafted Iron Man collectible isn't just a toy; it's a piece of cinematic history, a tangible echo of Tony Stark’s genius, wit, and ultimate sacrifice. Capturing the essence of these figures through "Iron Man Merchandise & Collectibles Photography" isn't merely about pointing a camera; it's about honoring the legacy, showcasing the intricate details, and telling a new story with your hero. Whether you own a colossal 1:4 scale statue or a charming MiniCo figure, the goal is to make your photos as heroic and impactful as Iron Man himself.
At a Glance: Your Suit-Up Sequence for Stunning Photos
- Lighting is King: Learn to sculpt with light – natural or artificial – to highlight metallic sheen and energy glows.
- Composition Tells a Story: Frame your Iron Man to convey heroism, action, or thoughtful reflection.
- Gear Doesn't Have to Break the Bank: Start with your smartphone, but know when to upgrade for finer details.
- Cleanliness is Crucial: Dust is your arch-nemesis; a spotless figure makes all the difference.
- Post-Processing Enhances, Not Hides: Use editing to refine, not completely alter, your original shot.
- Embrace Imperfection: Some of the best shots come from experimentation and happy accidents.
The Art of Capturing Tony Stark's Legacy
Tony Stark wasn't just the "first Avenger" to make a silver screen impact; he jump-started an entire cinematic universe, evolving from a charismatic, witty billionaire to a universe-defending saviour, putting it all on the line time and again. This evolution, this depth of character, is what makes his merchandise so special and so deserving of exceptional photography. As Iron Studios, a producer of exclusive, licensed statues, rightly points out, their pieces "reproducing important moments from the movies and comics" are crafted with incredible attention to detail – from facial expressions (even behind the mask) and costumes to the iconic scenarios themselves. These figures, often hand-produced and hand-painted from high-quality PVC and polystone, are designed for durability and intricate detail. Your photography should aim to celebrate every rivet, every battle scar, and every glowing arc reactor that makes these collectibles truly unique.
Think of your photography as an extension of Iron Man’s story. Are you capturing his determination, his courage, his strength, or even his sometimes arrogant but charismatic generosity? The way you light, pose, and frame your figure can convey these qualities, transforming a simple product shot into a piece of art that resonates with fellow fans. It's about bringing the static into dynamic life.
Essential Gear for Your Suit-Up Sequence (Photography Edition)
Before you can truly unleash your inner photo-journalist, you need to equip yourself. The good news? You don't necessarily need Stark-level tech to start.
Your Camera: From Smartphone to Super-Sensor
- The Smartphone You Already Have: Modern smartphones, especially flagship models, boast impressive cameras. They're excellent for beginners, incredibly portable, and often feature powerful AI enhancements. Focus on good lighting and stable shots, and you'll be surprised what you can achieve. They’re perfect for quick shares to social media or experimenting with angles.
- Mirrorless or DSLR Cameras: If you're serious about capturing exquisite detail and want more control over depth of field, exposure, and manual settings, a dedicated camera is the way to go.
- Key advantage: Larger sensors for better low-light performance, interchangeable lenses, and manual control for precise creative decisions.
- What to look for: A camera with good low-light capabilities and the ability to shoot in RAW format for maximum editing flexibility.
Lenses: Your Eyes for Detail
- Kit Lens (usually 18-55mm): Comes with most DSLRs/mirrorless cameras. Versatile enough to start, but often has limited aperture range.
- Macro Lens: This is where the magic happens for close-up shots. A macro lens allows you to get incredibly close to your Iron Man figure, revealing the intricate hand-painted details, the texture of the armor, or the precise glow of an arc reactor. Look for 60mm or 100mm macro lenses for optimal results.
- Prime Lens (e.g., 50mm f/1.8): A "nifty fifty" is affordable, offers excellent image quality, and its wide aperture (low f-number) creates beautiful background blur (bokeh), isolating your Iron Man from distractions.
Lighting: Sculpting with Photon Blasts
This is arguably the most critical component of great photography. Iron Man's metallic suits, from the Mark I lumbering out of a cave to the sleek Nano-Tech armor, are all about light reflection and shadow.
- Natural Light: The most accessible and often most beautiful light source.
- Window Light: Soft, diffused light coming from a window on an overcast day is ideal. It minimizes harsh shadows and glare.
- Golden Hour: The hour after sunrise or before sunset offers warm, soft light perfect for dramatic, cinematic looks.
- Artificial Light: For more control and consistent results.
- LED Panels/Small Continuous Lights: Affordable and adjustable. Look for lights with color temperature control (bi-color) and dimming capabilities.
- Desk Lamps: Can work in a pinch! Just be mindful of their harshness and color cast.
- Diffusers & Reflectors: Essential for softening harsh light and bouncing light into shadowy areas. DIY with parchment paper for diffusers or white cardstock/aluminum foil for reflectors.
- Mini "Glow" Lights: Small LED lights (e.g., fairy lights, mini puck lights) can be strategically placed to simulate repulsor blasts, arc reactor glows, or eye lights.
Tripod: Rock-Steady Support
A tripod is non-negotiable for sharp, detailed shots, especially in lower light or when using a macro lens. It eliminates camera shake and allows you to use slower shutter speeds for better exposure without blur. Even a small tabletop tripod can make a huge difference.
Backdrops: The Canvas for Your Heroics
- Simple Solids: Black, white, or gray seamless paper or fabric are excellent for clean, professional shots that keep the focus solely on Iron Man.
- Thematic Backdrops: Printed backgrounds (cityscapes, lab interiors, cosmic scenes) can add context and depth, though use sparingly to avoid overpowering the figure.
- Everyday Items: A textured piece of wood, a slab of slate, or even a crinkled piece of foil can create interesting ground textures or effects.
Cleaning Supplies: Eradicating the Cosmic Dust
Tony Stark wouldn't tolerate a speck of dust on his armor, and neither should you. Dust, fingerprints, and tiny debris are magnified in close-up photos.
- Microfiber Cloths: For wiping down figures.
- Rocket Blower: Essential for blasting away dust without touching the figure.
- Soft Brush (makeup brush works well): For delicate dusting in crevices.
Setting the Scene: Crafting the Perfect Stark Lab or Battlefield
Once your gear is assembled, it's time to create the world where your Iron Man figure truly shines. Remember that Iron Man’s story, as documented by sources like Iron Studios, often involves him in "important moments from the movies and comics," and your scene should reflect this.
Backgrounds & Dioramas: Building Your Cinematic Universe
- Seamless Simplicity: For a minimalist approach that highlights the figure itself, a plain white, black, or grey backdrop is hard to beat. This is perfect for showcasing the intricate details and vibrant colors without distraction.
- Environmental Context:
- Printed Backdrops: Affordable prints of cityscapes, spaceship interiors, or alien landscapes can instantly transport your figure to another world. Ensure the perspective and scale of the background roughly match your figure.
- DIY Dioramas: Unleash your creativity! Foam board, cardboard, paint, and various craft supplies can be used to construct miniature environments – a damaged city street, a section of Tony's workshop, or a desolate alien planet. Think about the specific scene you want to recreate or imagine.
- Everyday Items as "Scenery": A stack of books can become a towering building, crumpled aluminum foil can simulate rough terrain, or a strategically placed piece of fabric can be an alien landscape. Look around your home with a creative eye.
- Pro Tip: Always ensure your background is either clean and simple or adds meaningfully to the narrative. A cluttered, distracting background will detract from your hero.
Props & Accessories: Enhancing the Narrative
Iron Man figures often come with a wealth of accessories: interchangeable hands, repulsor effect parts, alternate head sculpts (showing RDJ's face, for example), and weapons. These aren't just extras; they're storytelling tools.
- Utilize Included Accessories: Swapping out hands for a repulsor blast pose, attaching flight effects, or using an unmasked head sculpt can dramatically change the feel of a shot.
- Create Your Own: Miniature debris (small rocks, broken plastic pieces), smoke effects (cotton balls, vape smoke, or even dry ice carefully used), or tiny light sources can add depth and realism.
- Scale Matters: Ensure any props you use are roughly to scale with your Iron Man figure. A 1:10 scale figure needs 1:10 scale props.
Posing Your Iron Man: The Hero's Stance
This is where you infuse personality and action into your static collectible. Iron Studios emphasizes the incredible range of details, including "facial expressions, costumes and masks," and even though Iron Man's mask is fixed, his pose can convey so much.
- Action Figures (Articulated):
- Dynamic Poses: Recreate iconic movie stances – mid-flight, blasting repulsors, landing, or ready for combat. Pay attention to balance and ensure the joints look natural. Use a flight stand if you have one.
- Weight Distribution: Make sure the figure looks like it has weight and isn't awkwardly floating or unbalanced.
- Expressive Gestures: Even subtle hand movements can convey a lot. A clenched fist for determination, an open palm for a repulsor blast, or a relaxed hand for contemplation.
- Statues (Fixed Pose): Your posing options are limited, but you can still make an impact.
- Angle is Everything: Experiment with camera angles. A low-angle shot can make a standing statue appear more imposing and heroic. A slight turn can emphasize its powerful silhouette.
- Focus on Detail: Since the pose is fixed, concentrate on highlighting the intricate sculpting and painting. Get in close to show off battle damage or the gleam of the armor.
- Conveying Emotion: Even with a masked face, the body language of Iron Man can speak volumes. Is he defiant, thoughtful, ready to strike, or victorious? Your pose dictates the emotion.
Illuminating the Armor: Mastering Light for Maximum Impact
Lighting is the secret sauce for spectacular Iron Man photography. His suit, whether PVC or polystone, has unique reflective properties that light can either enhance or diminish. You want to make that metallic finish pop and those repulsors glow.
Natural Light: Free, Abundant, and Beautiful
- Window Light: Position your Iron Man near a window. The quality of light depends on the time of day and weather.
- Overcast Day: Soft, diffused light – excellent for even illumination, minimal harsh shadows, and bringing out colors.
- Direct Sunlight: Can be too harsh, creating strong reflections and blown-out highlights. If you must use it, try to diffuse it with a sheer curtain or a dedicated diffuser.
- Golden Hour: The magic hour just after sunrise or before sunset. The low sun angle and warm light create long, dramatic shadows and a beautiful, cinematic glow on metallic surfaces. This is fantastic for heroic, outdoor shots.
Artificial Light: Total Control, Endless Possibilities
This allows you to sculpt light precisely, creating effects impossible with natural light alone.
- LED Panels/Desk Lamps: Use at least two light sources if possible.
- Key Light: Your main light source, typically placed slightly to the front and side of the figure. This is your primary illuminator.
- Fill Light: A secondary, softer light source, placed on the opposite side to gently fill in shadows created by the key light. A reflector can serve as a fill light.
- Backlight: Placed behind and slightly above your Iron Man, aimed at his back. This creates a rim of light around the figure, separating him from the background and adding dramatic flair. This is particularly effective for showcasing his silhouette and making his armor shine.
- Diffusers: Always use diffusers (softboxes, parchment paper, white fabric) to soften harsh artificial light. Harsh light creates unattractive reflections and deep, unforgiving shadows.
- Reflectors: White cards, foam core, or even aluminum foil can bounce light into shadowy areas, lifting details without adding another light source.
- Highlighting Details:
- Arc Reactor & Repulsors: Use small, directional light sources (like mini LED lights or even a phone flashlight) to create the illusion of a glow. Position them slightly behind or to the side of the actual glowing part to suggest emission.
- Metallic Sheen: Position your key light to catch the angles of the armor, making the metallic surfaces gleam. Experiment with the light's angle until you find the sweet spot that makes the material pop.
- Avoiding Glare: Glossy finishes (common on many Iron Man figures) can be prone to unwanted reflections. Adjust the angle of your lights and your camera until these glares are minimized or become aesthetically pleasing highlights. Polarizing filters on your lens can also help reduce glare.
Composition: Framing Your Hero's Narrative
Composition is how you arrange elements within your photo to guide the viewer's eye and tell a compelling story. It's about more than just Iron Man; it's about his world.
- Rule of Thirds: Imagine your frame divided into nine equal sections by two horizontal and two vertical lines. Place your Iron Man figure or key elements along these lines or at their intersections for a more balanced and dynamic shot than placing him dead center.
- Leading Lines: Use elements in your scene (roads, architectural lines, even the angle of a sword or arm) to draw the viewer's eye towards your Iron Man.
- Depth of Field (Bokeh):
- Shallow Depth of Field: A blurred background (bokeh) isolates your Iron Man, making him the undisputed focus. This is achieved with wide apertures (lower f-numbers) and longer focal lengths.
- Deep Depth of Field: Keeps both your figure and the background in focus. Use this when the background is an essential part of the story (e.g., a detailed diorama of a battle scene). This is achieved with narrower apertures (higher f-numbers).
- Angles: Perspective is Power:
- Low Angle: Shooting from below eye level makes Iron Man appear taller, more heroic, and more imposing, emphasizing his power.
- Eye Level: Creates a more personal, relatable connection with the figure, great for showing intricate details at a natural viewing perspective.
- High Angle: Looking down on Iron Man can create a sense of vulnerability or imply a larger threat he's facing. Use sparingly.
- Negative Space: The empty space around your Iron Man. Don't be afraid to use it. It can make your figure stand out, create a sense of scale, or convey a feeling of isolation or vastness.
- Creating a Narrative: Every photo should tell a story. Is Iron Man preparing for battle? Reflecting on his choices? Soaring through the sky? Your composition, combined with posing and lighting, should communicate this narrative instantly. As collectors, we understand Tony Stark's complex character – his resilience, fighting for good, and his genius. Use your shots to reflect these multifaceted traits. Don't just show the figure; show his spirit. View Iron Man Pictures for inspiration on diverse compositions.
The Finer Details: Capturing Every Rivet and Repulsor
Iron Man figures, especially those from licensed producers like Iron Studios, are renowned for their incredible detail. They are "produced and painted by hand, with an exclusive finish," guaranteeing "an incredible range of details, such as facial expressions, costumes and masks." Your photography should do these details justice.
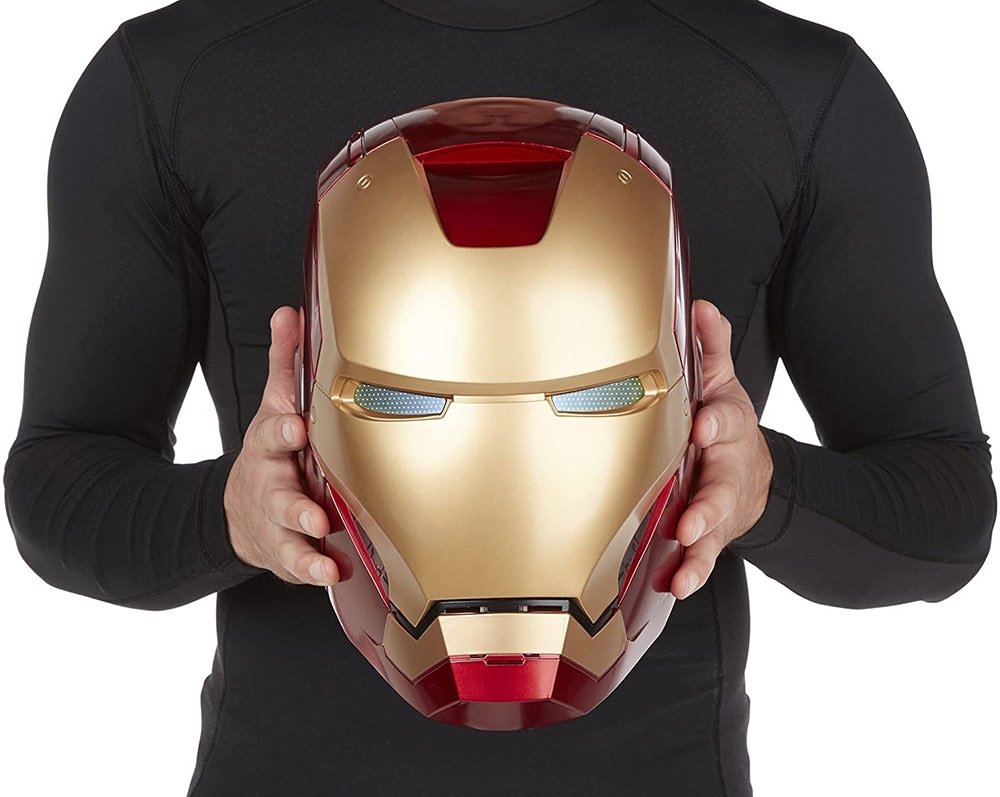
- Focus on the Iconic: The arc reactor is his heart; the repulsors are his power. Ensure these are sharp, well-lit, and if possible, subtly glowing. These are the elements that instantly identify the character.
- Armor Textures and Materials: Iron Studios uses PVC and polystone, high-quality materials that ensure durability and allow for intricate sculpting.
- Metallic Finishes: Use oblique lighting (light coming from the side at an angle) to bring out the subtle textures and sheen of the armor. This highlights the contours and battle damage effectively.
- Painted Details: Get close to show off the meticulous paint applications, weathering effects, and fine lines that bring the suit to life.
- Macro Photography Tips:
- Extreme Close-Ups: Don't be afraid to fill the frame with just a helmet, a gauntlet, or a specific weapon. This draws attention to the artistry of the figure.
- Focus Stacking: For extreme macro shots where depth of field is very shallow, focus stacking (taking multiple photos at different focus points and combining them in software) can ensure your entire subject is sharp.
- Magnification: A macro lens will give you 1:1 (life-size on sensor) magnification, revealing details invisible to the naked eye.
- Handling Different Scales:
- Large Scale (1:4, 1:6): These figures demand a broader perspective to show their imposing size, but also excel in detailed close-ups due to their larger surface area for intricate work.
- Medium Scale (1:10, 1:12): Versatile for dynamic action poses and dioramas. They offer a good balance of detail and maneuverability.
- MiniCo (Chibi/Stylized): These "cute representation[s] of Iron Man in a small size and with a beautiful design" are less about hyper-realism and more about character and charm. Focus on their expressive design and fun poses. Keep the background playful or simple to complement their style.
- Check for Imperfections: Before you shoot, do a final sweep for dust, stray hairs, or smudges. These are far harder to remove in post-production than they are to prevent beforehand.
Post-Processing: Enhancing Your Iron Man's Power
Once you've captured your raw images, post-processing is where you polish them to a heroic sheen. Think of it as Tony Stark tweaking his suit's software – enhancing capabilities, not rebuilding from scratch.
Basic Adjustments: The Foundation
- Exposure: Correcting overall brightness. Avoid blowing out highlights or crushing shadows unless for stylistic reasons.
- Contrast: Adds "punch" to your image, separating lights and darks. Use carefully to avoid an overly dramatic or artificial look.
- White Balance: Ensures colors are accurate. Adjust if your light source cast a color tint (e.g., yellowish from incandescent bulbs).
- Highlights & Shadows: Fine-tune specific areas. Recover detail in bright areas (highlights) and lift detail from dark areas (shadows).
- Clarity & Sharpness: Adds definition and crispness, especially useful for bringing out the intricate details of the armor. Don't overdo it, or your image will look artificial and crunchy.
Color Grading: Setting the Mood
- Vibrance & Saturation: Boosts or desaturates colors. Iron Man's iconic red and gold often benefit from a slight vibrance boost to make them pop.
- Split Toning/Color Mixer: Introduce specific color casts into highlights and shadows to create a mood (e.g., cool shadows and warm highlights for a cinematic feel).
- Hues: Adjust specific colors if they're not quite right (e.g., making the red more crimson or more scarlet).
Retouching: The Cleanup Crew
- Dust Removal: This is the most common task for collectible photography. Use the spot healing brush or clone stamp tool to meticulously remove any dust, fibers, or small imperfections that you missed during your pre-shoot cleaning.
- Minor Imperfections: Remove any tiny paint chips, mold lines, or other manufacturing flaws that detract from the figure. Be subtle; the goal is to enhance, not erase.
Adding Effects (Use with Caution!)
- Glows & Sparks: Software like Photoshop allows you to add subtle glows to arc reactors, repulsors, or eye lights. Crucially, these should enhance existing light, not create it from scratch. Overdoing these effects can make your photo look fake.
- Smoke/Mist: If you didn't use practical effects, you can add subtle smoke or mist effects in post-processing for atmospheric shots.
- Lens Flares: A touch of lens flare can add drama, but it's often best captured organically in-camera.
Software Recommendations
- Adobe Lightroom/Capture One: Excellent for organizing, basic adjustments, color grading, and non-destructive editing of RAW files.
- Adobe Photoshop/GIMP: Essential for more advanced retouching, compositing, and adding sophisticated effects.
- Snapseed (Mobile): A powerful and free mobile editing app for quick, effective edits on the go.
Common Pitfalls and How to Avoid Them
Even the most experienced photographers can stumble. Knowing these common mistakes will help you steer clear of them, ensuring your Iron Man photos are always top-tier.
- Poor Lighting: The number one killer of a good photo.
- Avoid: Flat, frontal flash from your camera, direct overhead light, or overly harsh, un-diffused light.
- Solution: Use soft, diffused light from multiple angles, or leverage natural window light. Experiment with key, fill, and backlighting.
- Cluttered Backgrounds: A messy background pulls focus away from your incredible Iron Man figure.
- Avoid: Shooting against a busy bookshelf, a cluttered desk, or a distracting wall pattern.
- Solution: Use plain backdrops (seamless paper, fabric), create simple dioramas, or use a shallow depth of field to blur distractions.
- Blurry Images: Nothing ruins a good shot like a lack of sharpness.
- Avoid: Hand-holding in low light, shooting with too slow a shutter speed, or inaccurate focusing.
- Solution: Always use a tripod. Ensure your focus point is precisely on Iron Man (often the arc reactor or helmet). Use a remote shutter release or camera timer to avoid camera shake.
- Ignoring Dust and Fingerprints: These tiny details are magnified in photos.
- Avoid: Not cleaning your figure before the shoot.
- Solution: Always perform a thorough cleaning with a rocket blower and microfiber cloth. Be prepared to do some dust removal in post-processing.
- Over-editing: While post-processing is crucial, there's a fine line between enhancement and artificiality.
- Avoid: Pushing sliders to their extremes, adding too many gratuitous effects, or making the figure look unrealistic.
- Solution: Aim for natural enhancements. Compare your edited photo to the original to ensure you haven't gone too far. Subtlety is key.
- Lack of Story or Emotion: A technically perfect photo can still fall flat if it doesn't evoke feeling.
- Avoid: Posing Iron Man in a generic, uninspired way.
- Solution: Think about Iron Man's character and his iconic moments. What message or emotion do you want to convey? Pose your figure dynamically, use props, and craft your lighting to tell a story.
Sharing Your Legacy: Displaying and Connecting
Once you've poured your creativity into capturing your Iron Man collectibles, it's time to share your vision with the world. This is where you connect with other enthusiasts and showcase your passion.
- Social Media Showcase: Platforms like Instagram, Facebook, and dedicated collector forums are perfect for sharing your work.
- Hashtags: Use relevant hashtags like #IronManPhotography, #ToyPhotography, #ActionFigurePhotography, #CollectiblePhotography, along with specific figure names (e.g., #HotToysIronMan, #IronStudios).
- Engagement: Interact with other photographers and collectors. Comment on their work, ask for feedback, and be part of the community.
- Online Communities: Beyond social media, numerous online forums and groups are dedicated to toy and collectible photography. These are fantastic places for constructive criticism, learning new techniques, and discovering inspiration.
- Watermarking (Optional): If you're concerned about your work being used without permission, consider adding a subtle watermark with your name or handle. Just ensure it doesn't detract from the photo itself.
- Build a Portfolio: As you improve, consider creating a dedicated online portfolio (e.g., on Flickr, Behance, or a personal website) to showcase your best work.
Your Mission, Should You Choose to Accept It
The journey of "Iron Man Merchandise & Collectibles Photography" is an ongoing one, filled with experimentation, learning, and immense satisfaction. Tony Stark’s evolution from an arrogant genius to a selfless hero reminds us that growth is constant. Similarly, your photographic skills will evolve with every click of the shutter.
Remember the incredible artistry that goes into these figures – the detailed sculpts, the hand-painted finishes, the high-quality materials like PVC and polystone, designed for durability and faithful representation of the character. Your mission, then, is to meet that artistry with your own.
Don't be afraid to try new things, break the "rules" occasionally, and most importantly, have fun. Each photo you take is a personal tribute to the legendary hero who jump-started the Marvel Cinematic Universe and captured the hearts of fans worldwide. Now, go forth and capture the enduring spirit of Iron Man, one incredible photo at a time.